Tuesday, September 10, 2013

Congratulations to Datuk Sin Fatt!

Two weeks ago, RL, a good friend, called to let me know that we would attend a celebration of our friend Ah Sin Fatt, who had been honoured a Datukship. A BIG congratulations to him and his family!!

Since moving here 2 years ago, I frequently heard about friends' friends who were honoured with a Datukship. I was curious to find out more about the 'Datukship' - from sources I understand it is an an Award of Honour given by The Sultans and Head of States in Malaysia. I found these two rather interesting and informative sites:

http://datukmalaysia.blogspot.com/

http://thedandelions.wordpress.com/2008/10/18/to-be-a-datuk-debunking-the-myths-of-the-conventional-approach-of-attaining-such-titles/

Back to the celebration of our friend Ah Sin Fatt: We were to celebrate over a Chinese dinner at the Lucky Plaza at Seremban 2 @ 7.30pm. The menu:


The appetizer: The lobster salad

It was empty! I missed out!! I was 20 minutes late!!  That evening I could not find parking. The parking lot was jam packed - usually it is not a problem to find parking even on a busy evening. I wish somebody had warned me... you know, I had to walk more than 450 meter on a hot evening... I nearly died!!


Second course was a bowl of Herbal Fish Stomach soup aka Fish Maw soup with one scallop, one  Chinese mushroom, one chicken wing and two cranberries. Friends explained that this soup would do me good if consumed while hot! Believe it or not, it it suppose to give you smoother skin and is an  excellent source of collagen. Of course I did not want to miss out on having even more beautiful skin ;-) so I gobbled down the soup... very delicious!!


 Third dish: a stirfried mixture of mushrooms, vegetables and pork shoulder


Fourth dish: steamed pomfret with light soy and spring onions. It was extremely fresh and sweet. 
Very well done!
 

Fifth dish: Fresh fried Bok Choy


Sixth dish: Chinese fried rice with shrimps, peas and bacon. Quite delicious.


The last dish of the evening: the colorful fruit platter served nicely in bite-sized pieces. It included the  purple dragonfruit, red watermelon, yellow mango and pale green rockmelon.
Local and guaranteed fresh!
 
 
Right after finishing the fruit platter, everyone around the table got up and started leaving. I was wondering what was going on that called for such a sudden departure... upon asking, I was told that dinner is done so it was time to go home!
 
And so I followed the crowd out the door... else I would be left sitting alone at the table! That was the end of the evening - the Chinese Malaysian way ;-) 
 
Malaysia Boleh! Thank you very much.

Thursday, September 5, 2013

Open House

We were thrilled, for the second time, we were invited by neighbour in our  little community here in Seremban 2.  It was an Open House for all residents to help celebrating the final day of Hari Raya Aidilfitri. We want to thank  Mr. MRH and his Family for the generosity and hospitality for the lovely evening. Through this informal gathering, we certainly came to know a few more of my neighbours..Malaysia Boleh!!

It was indeed, hunger go nowhere??  Hey buddy, this way..

Look at the trays and trays of Home Cooking Delicious Malay Food..


It just been a long time since we had a really good satay. Good Satay means: there is no chicken fat and no fat and skin in between the meat even though it tasted deliciously from the the bbq.   Satay > Malaysian BBQ style of (right) well marinated meat of chicken and beef served with the most delicious sweet spicy coarseed peanut sauce (center) and the condiments consisted of pieces of cucumber, red onions and ketupat (pressed rice)..


Trays of Malay Desert from centre and to the right.  On the left hand side are part of the trays for Curry Mee, consisted of curry broth, with addition condiments of cooked chicken pieces, hard boiled eggs, tou foo, slices of fish cakes, bean sprout, deep fried crispy shallots and some finely chopped spring onions uhm..can't you not see, forgotten to take a snap!! ..Had only one small serving..Delicious... cannot eat any more lah.. ! 


Trays of Rendang, Ayam Merah and Sayur Kali


Trays of sweet watermelon pieces and tapioca chips


We saw this on our way home..What??? How could we missed this..A whole NZ roasted lamb??  
Alamak!!!

Saturday, August 31, 2013

Who Needs A Bread Machine Part 1

You know it is always a great satisfactory that every three to four weeks, it is like a routine that I  would go and shop for bread ingredients for baking our very own bread when the last loaf was nearly finished. Our favorites are the Wholemeal Bread and the sometimes, if I could not find the Wholemeal Flour, then the High Protein Flour aka Bread Flour is my next alternative.

But it isn't just about any ordinary Wholemeal Bread you could purchase from the shop (I do not think you can get this!)  .  This is a 100% Wholemeal Bread I have created, without  any addition of other bread flour. It is full of flavor of the wholesome wholemeal flour, with addition of sultana, nuts and seeds and its very chewy. The result of a loaf of this bread is very dense, may weigh a ton; as it is a heavy loaf of bread and it can easily fills your tummy with just one slice of it..Believe me!!

Prior living in Asia,  I have never heard of a bread machine. I was taken by surprised honestly  Okay, you may say I am outdated;  but honestly, when I learned to bake bread during my early of the residency in Denmark, I taught myself how to proof, knead and bake from the stretch, from the Danish Women Magazines.

The Danes are very proud of their bread culture. As Denmark, one of the Nordic countries, is an agriculture land, it produces one of the finest quality of wheat and grain of so-called Rye and Whole Wheat Flour to named a few.

And  have you heard of the Danish Open-Faced Sandwiches on Rye Bread from Denmark, the Scandinavian country??  And why should you, if you have no idea what I am talking about??

Before going any further, I would like to share some information with you, regarding Danish Open Faced Sandwiches.  Please go to this beautiful link, full of colorful pictures:
And what is rye bread? I have found this site.  Original and nice pictures.  Explanation is good and in detailed.  I know for sure, one day I am going to try to bake this..My main problem is to get hold of the Rye Flour and the Whole Wheat Flour in Seremban??

For further information, please take look at this link:
http://www.danishsandwich.com/2011/01/real-danish-rye-bread-rugbrd.html


Likewise, with respect of different types of breads using different types of methods; the results turned out to be right, not too good, something is missing or just perfect [hope I could remember to bake like this the next time?!].  
However, the influence and understand the differences of the type and the freshness of flour used; the temperatures and the rising times.  These are the vital elements to the result of flavor and texture of the bread.
I am going to demonstrate how I bake my own fusion of Wholemeal Bread. Hence, before proceeding, I need you to read and understand why it is done this way.

Prior commencing, ensure you have all the ingredients [mise-en-place] and have understood the recipe.  If not, please read again.   And not just that, you must require to have loads of patience, time and passion..  Baking bread usually takes not less than 2 1/2 hours!!

By reading through this recipe [ for those who knew already] I know it is going to sound so wrong by using 200 ml of boiling water into the total mixture of Ingredient [A]??

You see, by the time you were done by adding all the ingredients together, [the water temperature + the total food ingredients,] I will rest assured that the the temperature will be lower}..A correct warm bread dough recipe makes the bread proof faster.

Ever since moving here to Malaysia, I have found out the best way of proofing your bread is simply proof it under the tropical sun - the natural way!! Or proof it in warm conditions where it should take less than an hour.

You need to proof your bread in an enclosed area > in a bowl or in an enclosed plastic bag.  Leaves the shaped dough in a warm place, covered, so that the drought does not get into it.  Moreover, it needs to have optimum humidity and  [a constant] temperature.

The definition of proofing in bread baking terms means to allow the dough to rise. A simple bread recipe needs to proof two times. First in the covered container/bowl and second and final proofing in the baking forms. Both times need to be proofed.

This is a very simple method, please follow the instruction.

 From my frequent baking bread experiences, since using instant yeast [comes in sachet or in small carton, get them in supermarkets and baking stores], these instant yeast are made in a very fine granules and is stirred directly into the flour.

I am using a heavy duty electric mixer for all my bread making.


Ingredients
[A]
200 ml boiling water
400 ml temperate water
1/2 teaspoon salt [you may add more ]
125 ml vegetable oil [not peanut, coconut or olive oil]

[B]
150 gm whole skinned almond
150 gm raisin
100 gm flex seeds

[C]
1 kg wholemeal bread flour
1 1/3 tablespoon instant dried yeast

1 egg

Methods:

1.  In a large bowl, add ingredient [A]. Pour ingredient [B] into it. Let the ingredients soak for a little while. Then add in ingredient [C].  Wholemeal flour first,  then the last ingredient, the instant dry yeast on the top.  If you do it otherwise, the hot boiling water will kill the yeast!!  On the contrary, cold dough takes longer to proof.


Closed up picture of the two different thermometers at two different temperatures with the same boiling water

2.  Fit with the dough hook attachment, turn on your alarm clock to 10 minutes.  Kneading the dough at low speed for 1 minute, until well combined.  Then kneading at  medium speed [depending on your machine]; and let it do its kneading thoroughly for 10 minutes.  Scrape the sides of the bowl if necessary.  until it forms a dough that clears the sides of the bowl.


Finished kneading, transfer into another big bowl.  Covered the whole dough with some flour.  so that it will not stick to all sides.


It is 3/4 its size after just 1/2 hour

A close up
3.  Coat the dough with flour, and cover with the lid or plastic wrap..until it is doubled in size for about an hour, under the tropical sun..


The dark bowl is the Wholemeal Bread
A full double size after an hour proofing
A close up


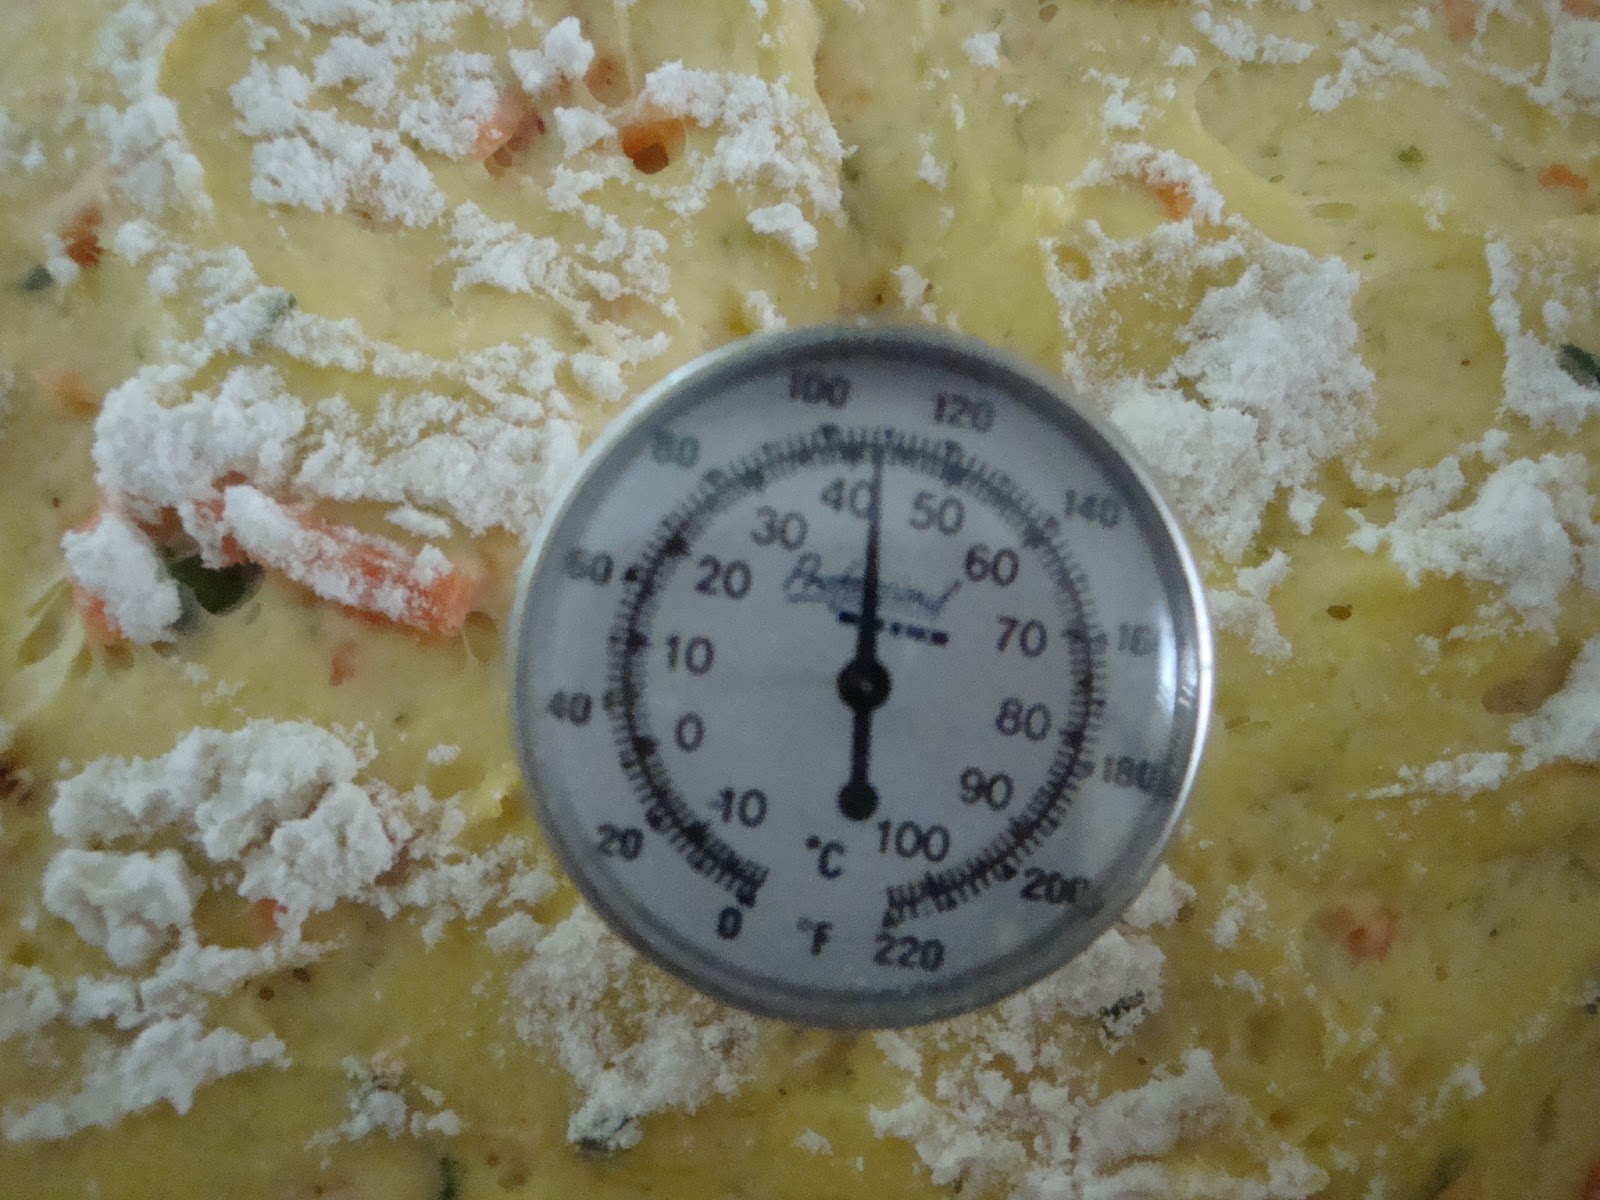
 Just came in from the tropical sun (almost sun tan!!)  The temperature in the bread dough was 40 Celsius
4.  Preheat the oven by turning it on low to 50 Celsius..


5.  Turn the dough out onto the floured workplace and divide into 2 equal portions.  Form the dough into loaves and place them onto the prepared greased pan.  Slash 3 small cuts by using a very sharp knife, egg washed them, put them back in the oven,  proof until the dough has doubled in size.  This process may take another 1/2 hour.


6.  Turn the oven to 170 Celsius, bake the dough turned into golden brown for about 50 - 60 minutes.


7.  Remove the loafs from the baking container and cool on the wire rack.


These two Carrot Breads were sandwiched between the Big Brothers: The Wholemeal bread.
Please do not take the chance of slicing a loaf of new fresh baked bread just came out from the oven.  It has to be allowed to get cold completely [probably this will take 1/2 to 1 hour depending of its atmosphere]..  Use a good serrated knife aka bread knife, if you  want a good slice of bread.  Otherwise,the whole loaf of bread will miss its shape.

Bon Appetite!!


Who Needs A Bread Machine Part 2

Another moist and soft carrot bread I have invented; full of texture and flavor.  You should give a try!  It is tested with guarantee!

The processor is quite similar to the Wholemeal Bread.

Ingredients:
[A]
200 ml boiling water
400 ml temperate water
1 teaspoon fine salt
120 ml cooking oil [not peanut and olive oil]

[B]
300 gm shredded carrot

[C]
1 kg High Protein Flour
1 tablespoon instant dry yeast

[D]
90 gm chopped spring onions [the whole]

Methods:

1.  In the work bowl of the mixer, fitted with bread hook attachment.  Pour ingredients [A] then add ingredients [B]. Mixed well together.

2.  In low speed, add ingredients [C].  High Protein Flour first, then the instant yeast.  Knead in low middle speed for about 2  minutes.


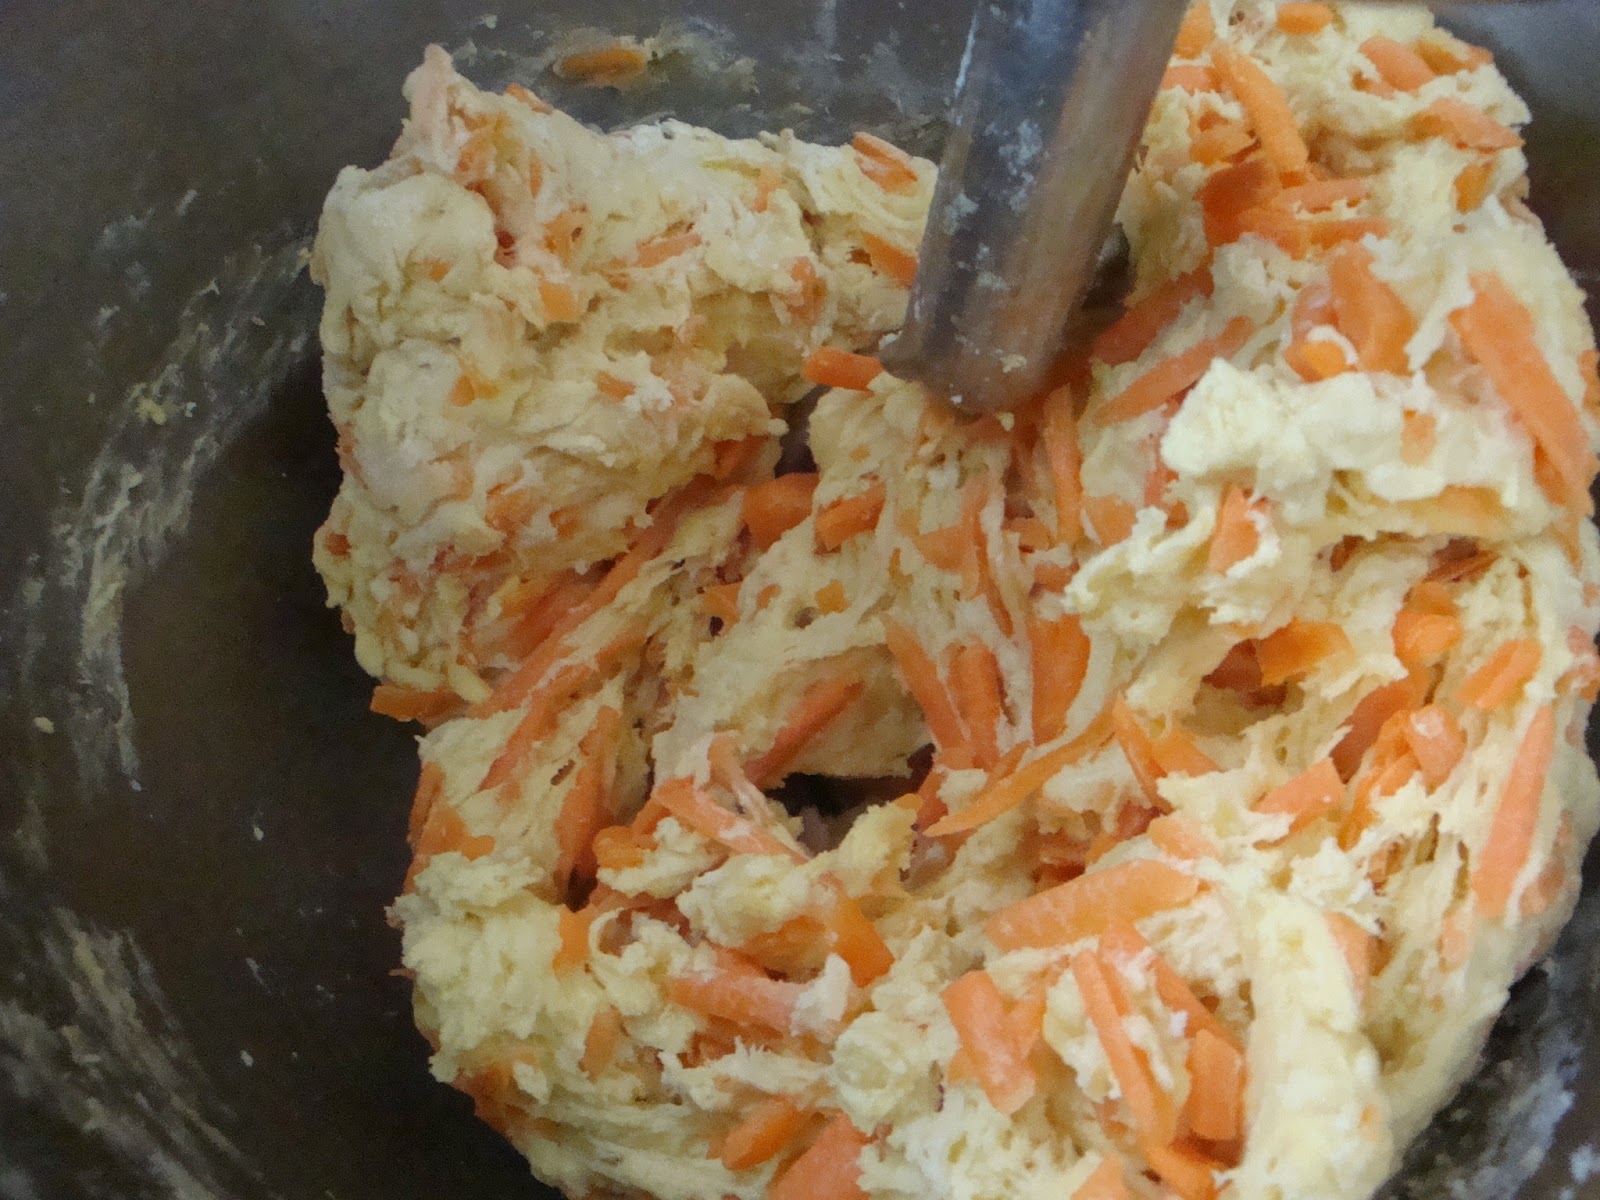
3. When the soft dough is ready to formed, pour in ingredients[D] all at once. Knead the dough for about 7 to 8 minutes set your timing or less]. Again knead it in low middle speed, otherwise the chopped spring onions will produce a lot of moisture.  when it does, add in one tablespoon of flour at a time. Two the most. If the dough is becoming wetter, the kneading process needed to be stopped This dough will turn quite a sticky one, use a plastic dough scraper, remove the dough from the paddle and bowl onto a lightly floured surface for kneading into a dough.


The finished kneading dough's temperature at the moment is around 38 Celsius.  Perfect!!


4.  The dough is ready to be proof for the first time, put the dough in a bowl with a cover, under the tropical sun, proof it for about 45 minutes, double the original size.


Just came from the sun, the temperature has risen to nearly 45 Celsius.. Awesome!!!!


The total weigh of the dough is 2110 kg, plus a few tablespoons of flour > 2191 kg


5.  Divide the dough according to your liking.


6.  Using a pair of scissors, snap two cuttings in the middle of the dough and apply egg washed .


Let them rest/proof for another 20 minutes

Put them in the preheated oven of 170 Celsius and bake for about 20 - 25 minutes


I hope the above explanation is clear and understood.  Otherwise please voice out.

This is an uneven oven, a bit troublesome. You need to be able to know when it needed to change the baking position, whether the bottom part of the loaf needed more baking or the top . The best thing about this oven is bake one at a time!!

I must confessed that baking with the High Protein Flour [HPF] aka Bread Flour produces magic bread. They are softer, more elastic and extra chewy   This is a high protein flour is used in yeast breads.

Unlike using the ordinary wheat flour were you could easily obtained from the local shops here, the result of the bread was very dense, not too elastic nor chewy.  There wasn't any flavor expect some old flour taste..But naturally the flour itself has its own purposes, can't avoid!!

Perhaps, it is all about, the quality, freshness, storage, temperature and packaging.


Monday, July 1, 2013

The Classic New York CheeseCake

There is always so much talking about Cheesecake amongst the local ladies' acquaintances  ..This is THE total indulgence, they simply LOVE their Cheesecake.  After merely two years here, I have noticed the eating habits here  are so, to say peculiar..The talk was always goes with as far as sweet cakes are concerned, "it shouldn't be too sweet!", "Its too much cream lah.. or it is too creaming!!" "It tasted too much dairy - too heavy 'cow taste/smell'...[You see, the Asian loves their cream and cheese, but yet...]  It is so damn difficult to satisfy the Asian palate, honestly.!!!!! 
 
In contrast to their European counterparts, the  local cheesecake has layers of very soft and moist sponge cake, filled with cream cheese  and whipped cream. Through their creativity and cleverness, the local Cheesecake is filled with local produce and satisfying palate for example, Durian Cheesecake, Gula Melaka Cheesecake and Pandan Coconut Milk Cheesecake, just to name a few..   I presume such way of making a cheesecake is to 'lighten' the heaviness [the creamy part] of the 'real' cheesecake.
 
Where else the general making of cheesecake is the combination of crust pastry with a filling  of cream cheese, ricotta, sour cream, cream fraich and sometime mascarpone.  Or simply just a combination of two of these cheeses would be equally delicious.  These combination is usually enriched with eggs and whipped [double or thicken] cream [and not with light or single cream, otherwise you cannot obtain the volume of the whipped cream].
 
It was in the early days after the graduation of my culinary study in Austria, I accidentally found a non paid slip subscription of the Cook Book from the Time-Life magazine..Not really knowing what it was, I knew they were books..I filled in the blank with my details.  
 
Having totalling forgotten it, one day the post man knocked at my door...How?? To make story short, my last landlady must have redirected my mail to Denmark .. 
 
-  God morgen, Jeg har en bog for dig..  Good morning, I have a bog for you..

-  En bog?  A book?

-  Ja.   Yes.  [The post man had shown me the cover of the book]
 
-  Vil du ha' det?   Do you want to keep it??
 
-  Ja tak.   Yes please.
 
-  Venligst tage dette følgesedler og betale på det lokale postkontor ..
    Please take this slips and pay at the local post office..
 
Well, this Good Cook book is still with me and I am utilising it diligently..not only it is filled with beautiful pictures, it certainly contained comprehension descriptions.  Reading a good cook book as such, helps me and simultaneously guides me to comprehend the structure and the science of baking. And I promise you they are rather  intriguing and never a dullest moment.
 
No doubt, there countless variation of Cheesecakes, but non like Lindy's.  I can promise you because I have tested and eaten this countless of  [5] times and I would highly recommend. It is originated from the Lindy's Restaurant, a New York establishment...That was in its heyday, the restaurant is gone but the recipe survives..  The recipe is from The Good Cook - Cakes & Pastries by The Editors of Time-Life Books.
    
Although I had baked this cake several times, but these two photos below were taken from my very first attempt last year. There were certainly some preparations to be made before baking..Mind you the anticipation of this is quite a comprehensive cheesecake recipe and you need to read it several times in order to comprehend its content;  follow each steps of the recipe.  It is crucial you have already prepared a mise en place.
[The French term mise en place (meeze-on-plahs) means to have all the  recipe ingredients measured and prepared]
 
This is not an easy cake to  bake for a beginner, but you need to tell yourself you have all the time in the world.  There shouldn't be any rushing, no bad day, just on the contrary that you are looking forward to bake a good and successful wholesome cake..you are in a good mood and loads of patient!!  Not only there shouldn't be any disturbance, especially no long chatting on the phone..there is absolutely no space in baking!!
 
The verdict of the cake
 
As a first timer, even though I was absolutely concentrating, still I have made several mistakes.
 
Looking at these photos, I know it looked quite burnt on the crust, probably I have left it in the hot oven too long; perhaps being I was being too engaged in making the Cheese filling..Perhaps the oven bell has rang, I didn't hear it??
 
Nevertheless, the crust tasted deliciously [with little burn], however it was still crunchy; even after several days in the fridge.  OK there was a cracked on the cake itself  > due to my carelessness of the temperature!
[I should have known better!]
 
When the cake is totally cold, put it in an enclosed container in the fridge.  Please consume this cake only after the second day!  It tastes wonderfully, deliciously and smelt in your mouth!  The texture of the cake is  tangy flavour, smooth, creamy and velvety, with the combination of its crusty pastry; one can't say no to such delectable dessert/cake..   It is a heavy duty one, one should not be greedy while consuming [this] cheesecake..a smaller bite at a time..Otherwise, it will sit like a bomb in your tommy..
 
Serve it chilled, with your favourite/good cuppa of tea or coffee..Believe me, you will not be disappointed! 
 
In conclusion, it took me about 4 hours to bake produces a nearly 2kg Cheesecake.  It was awesome experience and worth every seconds and I am going to bake this again in the future..
[Sorry, I didn't have a picture of a slice of the Cheesecake..?!]


 Lindy's Cheesecake
 
To make one 22cm (9 inch) cake  > I made 24cm (10inch) cake


Biscuit dough
 
129g flour, sifted
60g sugar
1 tsp grated lemon rind
1 egg yolk
1/4 tsp vanilla extract
125g butter, cut into small pieces
 
Cheese filling


1 kg cream cheese, at room temperature
400g sugar
3 tbsp flour
1 1/2 tsp grated orange rind
1 1/2 tsp grated  lemon rind
1/4 tsp vanilla extract
5 eggs
2 egg yolks
6 tbsp double cream


Methods
 
1.  Prepare the biscuit dough by first combining the flour, sugar and lemon rind in a small bowl.  Make a well in the centre and place the egg yolk, vanilla extract and butter in it.  Using your fingertips, mix the ingredients until the dough comes away from the sides of the bowl and forms  a ball.  Wrap the dough tightly in aluminium foil and refridge it for about 1 hour.
 
2.  Preheat the oven to 200 Celsius.  Lightly grease the bottom of the spring-form tin.  Place half of the dough on a lightly floured board and roll it out to 3mm (1/2 inch) thick.  Place the dough on the bottom of the tin and trim the edges. 
 
3.  Add the trimmings to the rest of the dough in the refrigerator.  Place the bottom crust on the middle shelf of the preheated oven and bake it for about 20 minutes, or until the crust is pale gold.
 
4.  Remove the crust from the oven and place on a rack to cool.  When the crust is cool, grease the sides of the tin, set it around the base and lock it.
 
5.  Roll the remaining dough into two strips about 3 mm (1/8 inch) thick and long enough to line the side of the tin.  Fit the stips into the tin, pressing the ends toether to seal.  Trim and discard the excess dough.  Preheat the oven to 230 Celsius.
 
6.  Beat the cream cheese with a wooden spoon.  Blend in the sugar, flour, orange and lemon rind, and vanilla.  beat in the eggs one at a time, and then the egg yolks.  Stir in the cream. 
 
7.  Pour the mixture into the assembled crust and place it in the oven for 15 minutes.
Reduce the temperature to 100 Celsius and bake the cake for 1 hour more.
 
8.  Remove the cheesecake form the oven and place it on a rack to cool.  Let it cool for at least 2 hours before removing the sides of the spring-form tin.